

Steve Q
Moderators
-
Joined
-
Last visited
Everything posted by Steve Q
-
Does the battery need coding to the car? I'd say it was the sensor if the battery is new and coded (if needed).
-
I agree with cliff on this the driver's door module controls all the other doors.
-
You're welcome. Even from the garage that fitted it, even if it's aftermarket the egr should have a warranty of some sort.
-
As our members will know we attend various shows throughout the year. But we are looking to see what other events or functions our members would like us to organise such as breakfast meets, dinners, museum visits, rolling road days, special cafe visits like ace cafe etc? What do you think. What other things would you like to see with the club to encourage you to participate? What other suggestions/ideas do you have to strengthen the club?
-
If you've had a genuine egr then I'd say it unlikely be that (some after market ones are known to fail within weeks). The warranty on the egr, If done at Audi it should be a year. Could it be the cats as the diagnostic check says I wonder? Or as Steve says a sensor. Sometimes sensors fail but instead of diagnostic Bringing up the sensor fault it says there's a mechanism fault instead.
-
Is anyone interested in attending this show? I can arrange a club display if so.
-
Keep us posted 🙂
-
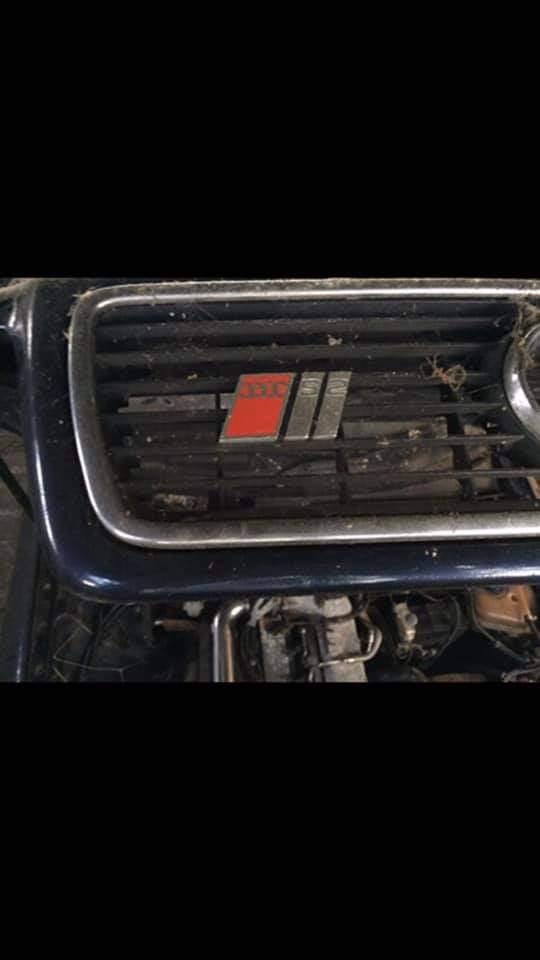
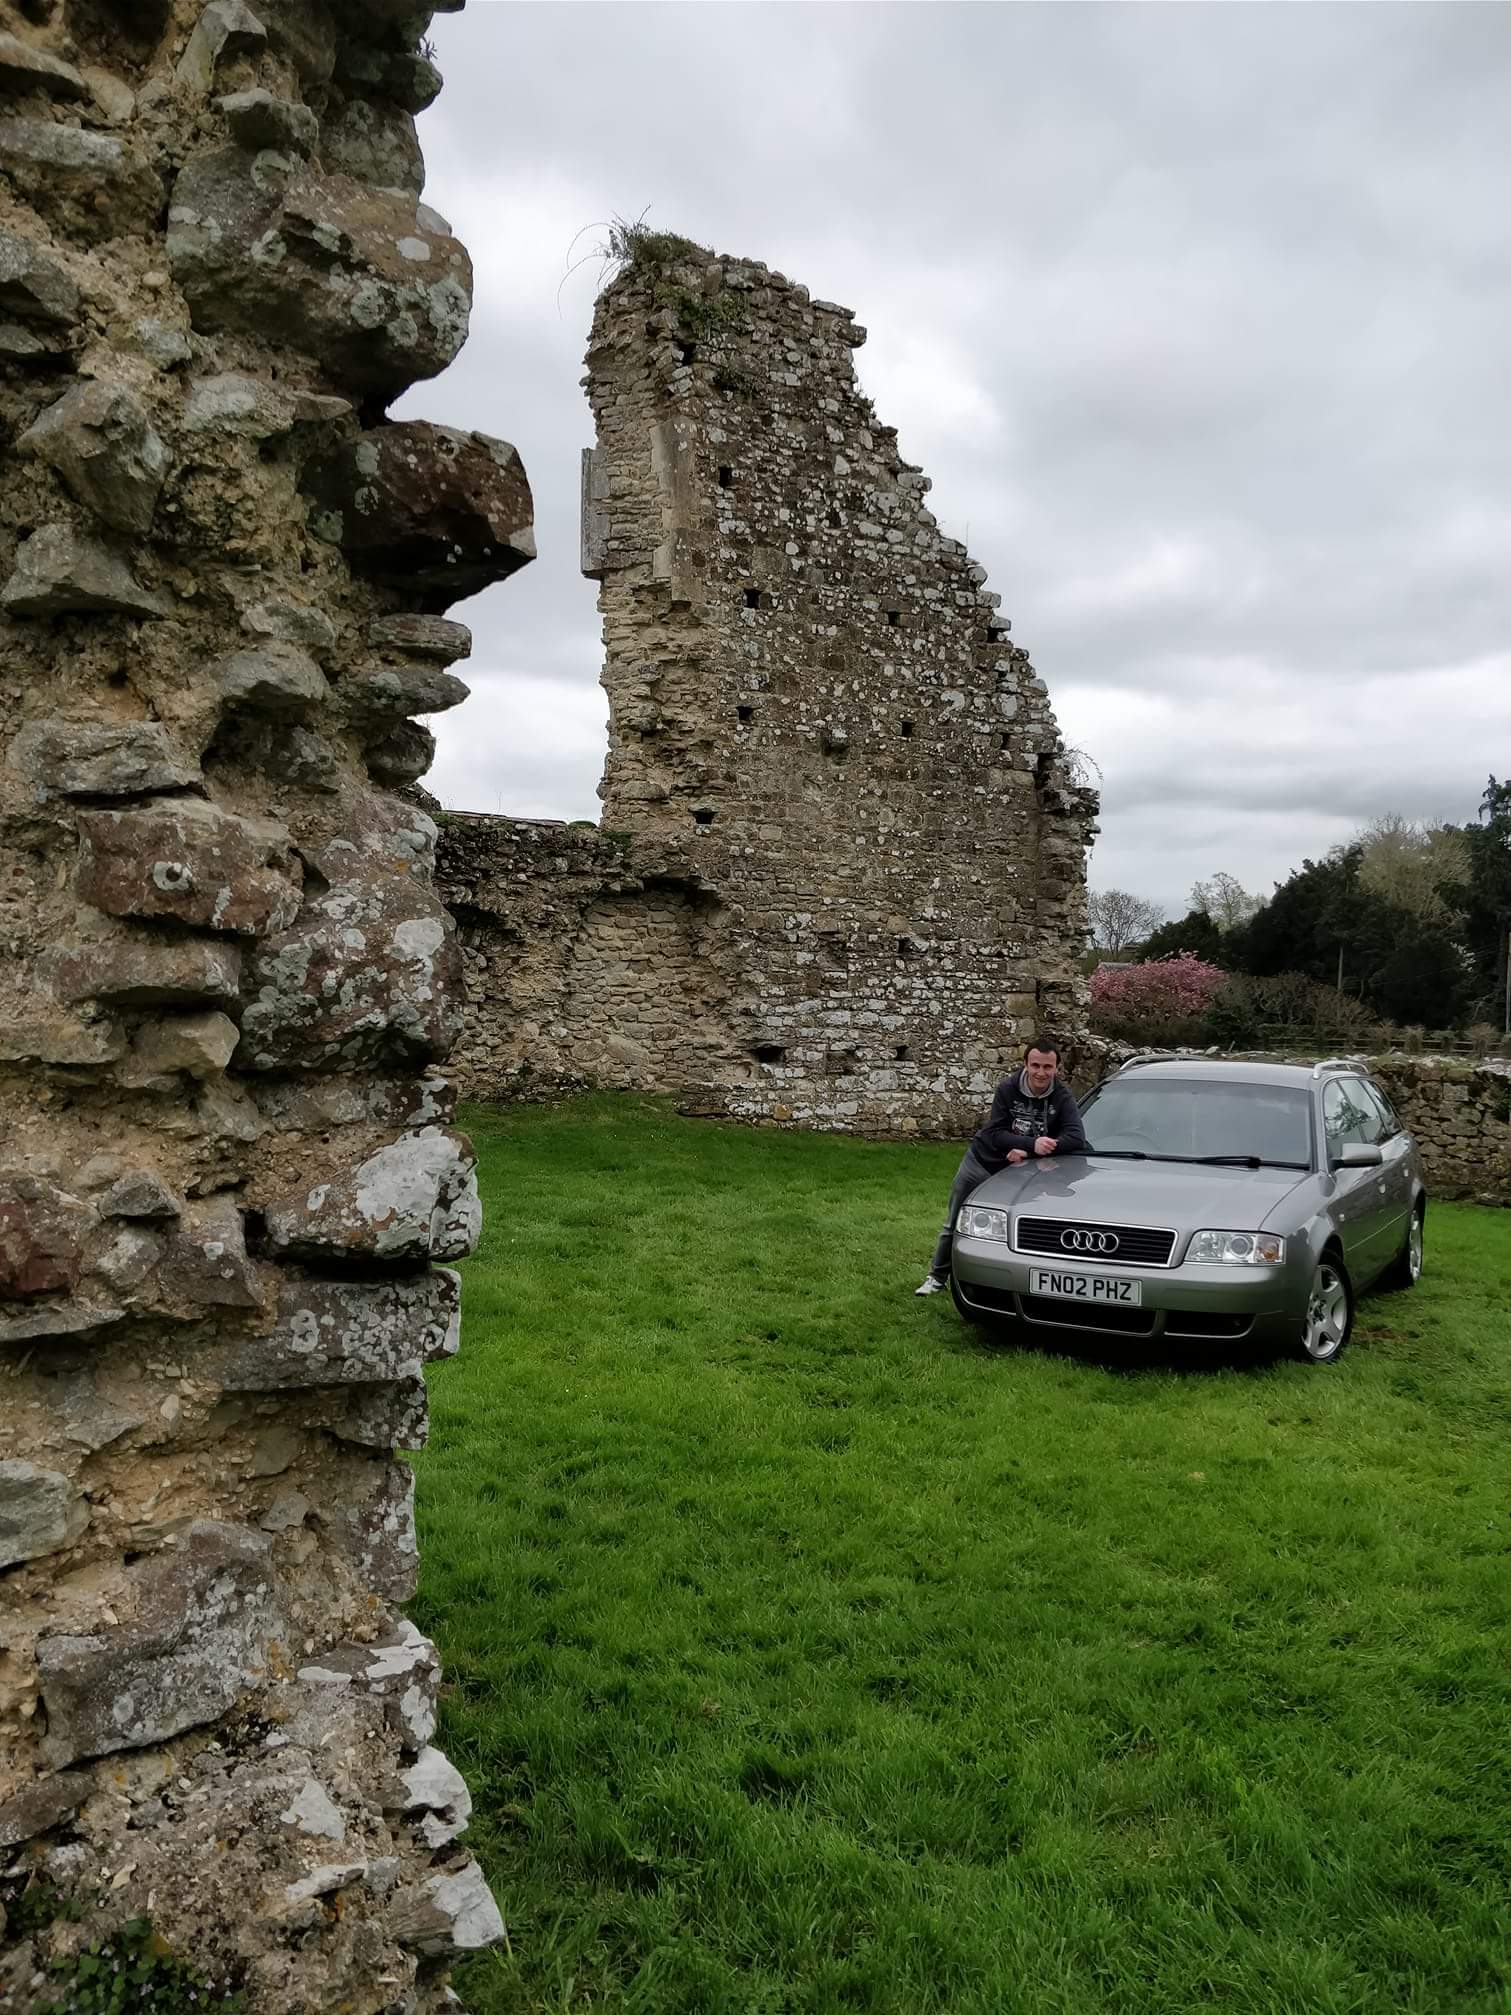
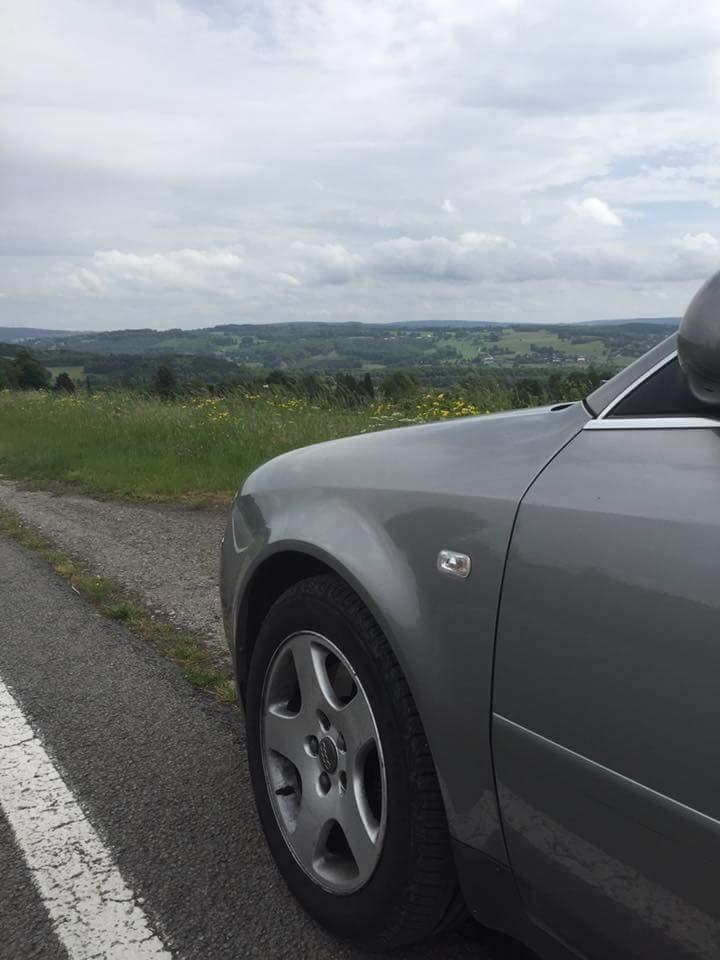
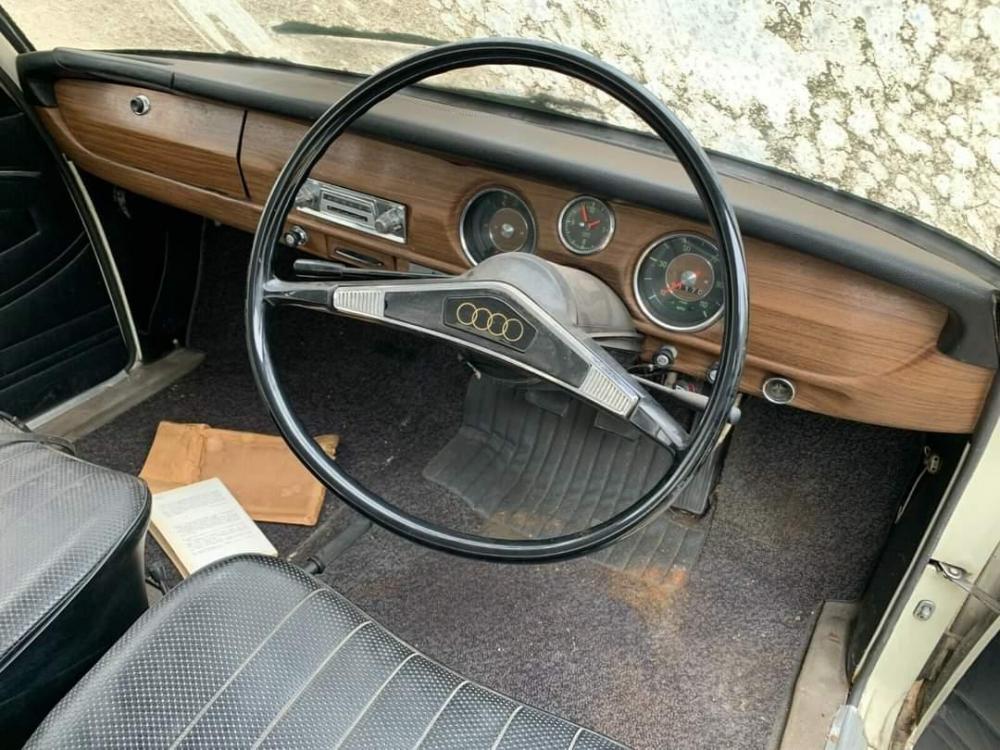
Here's some more: Pic 1 Audi 80LS Pic 2-4 Audi 70 Pic 5-9 S2 Pic 10 needs no introduction!


-
Don't know about you guys but I'd love this for shows. However for the rest of time I wouldn't want to drive it, to preserve it.
-
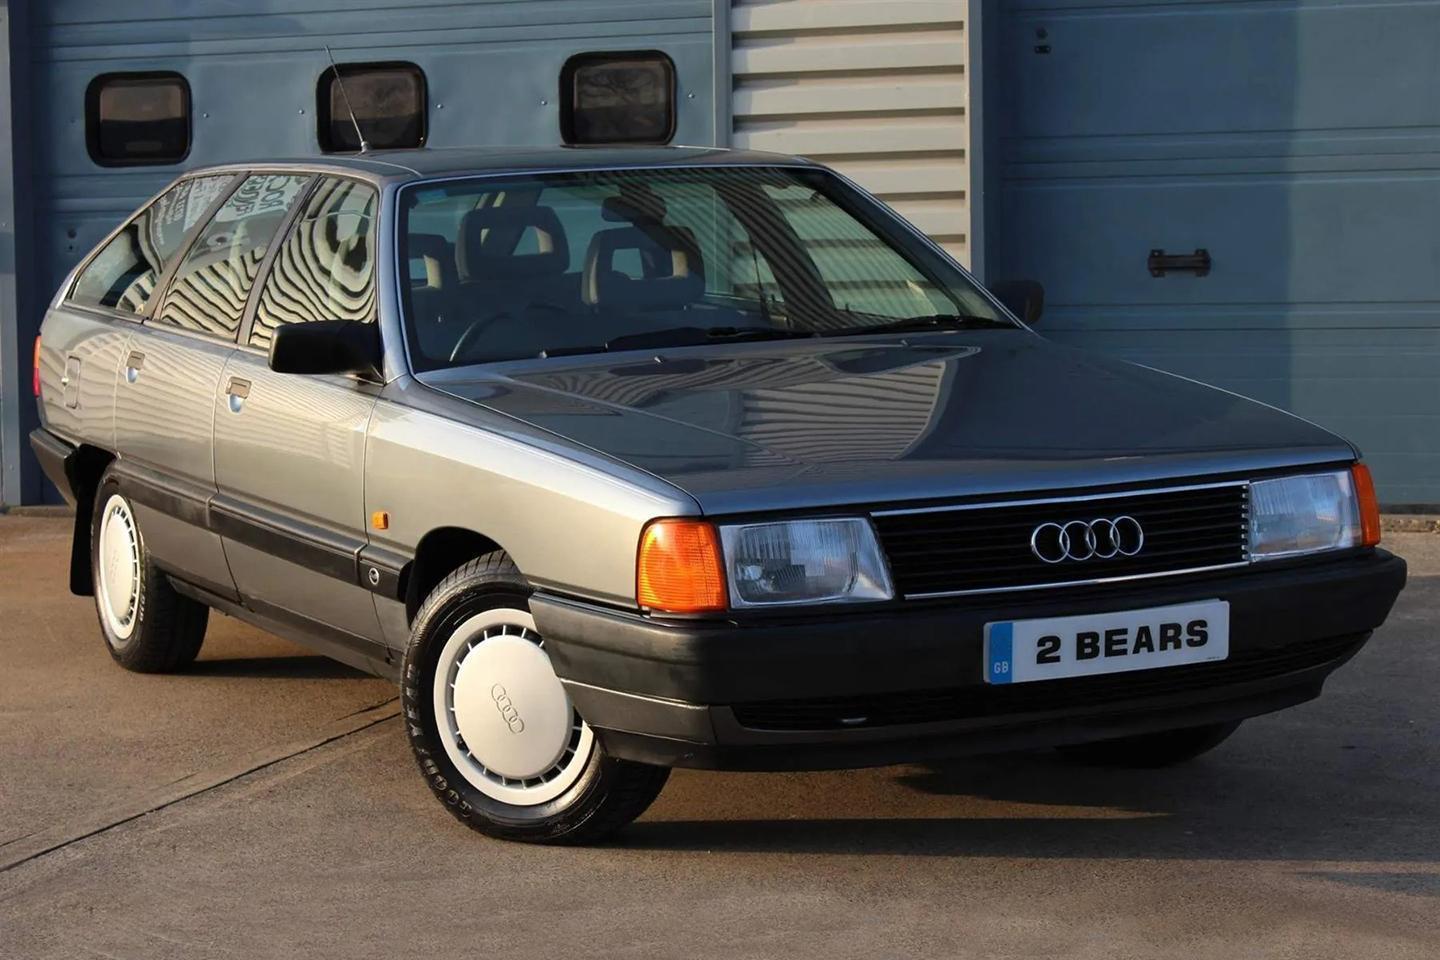
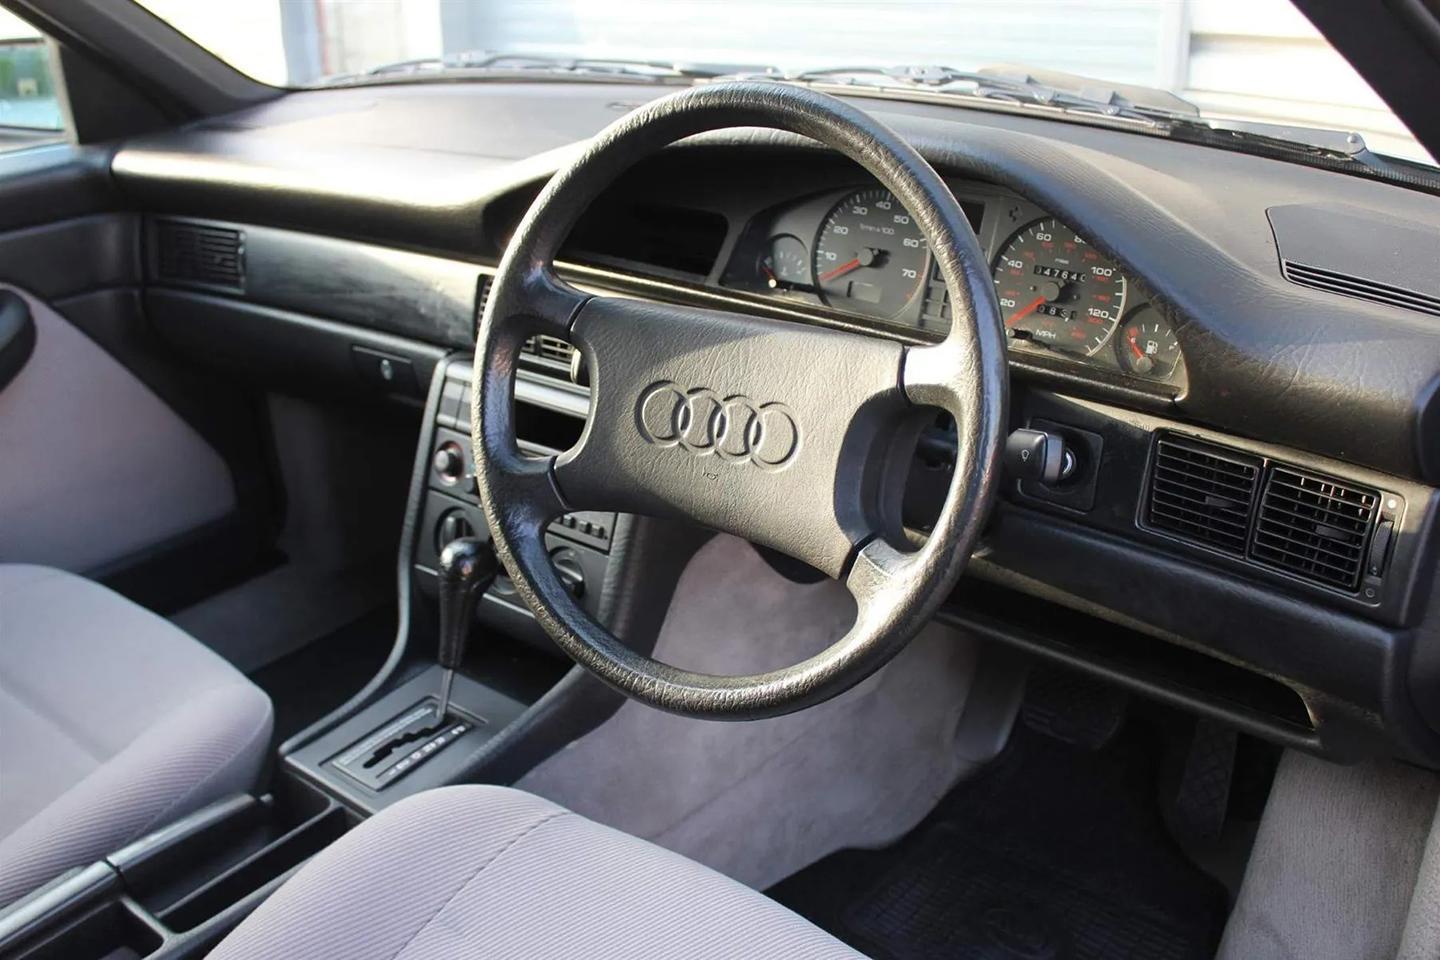
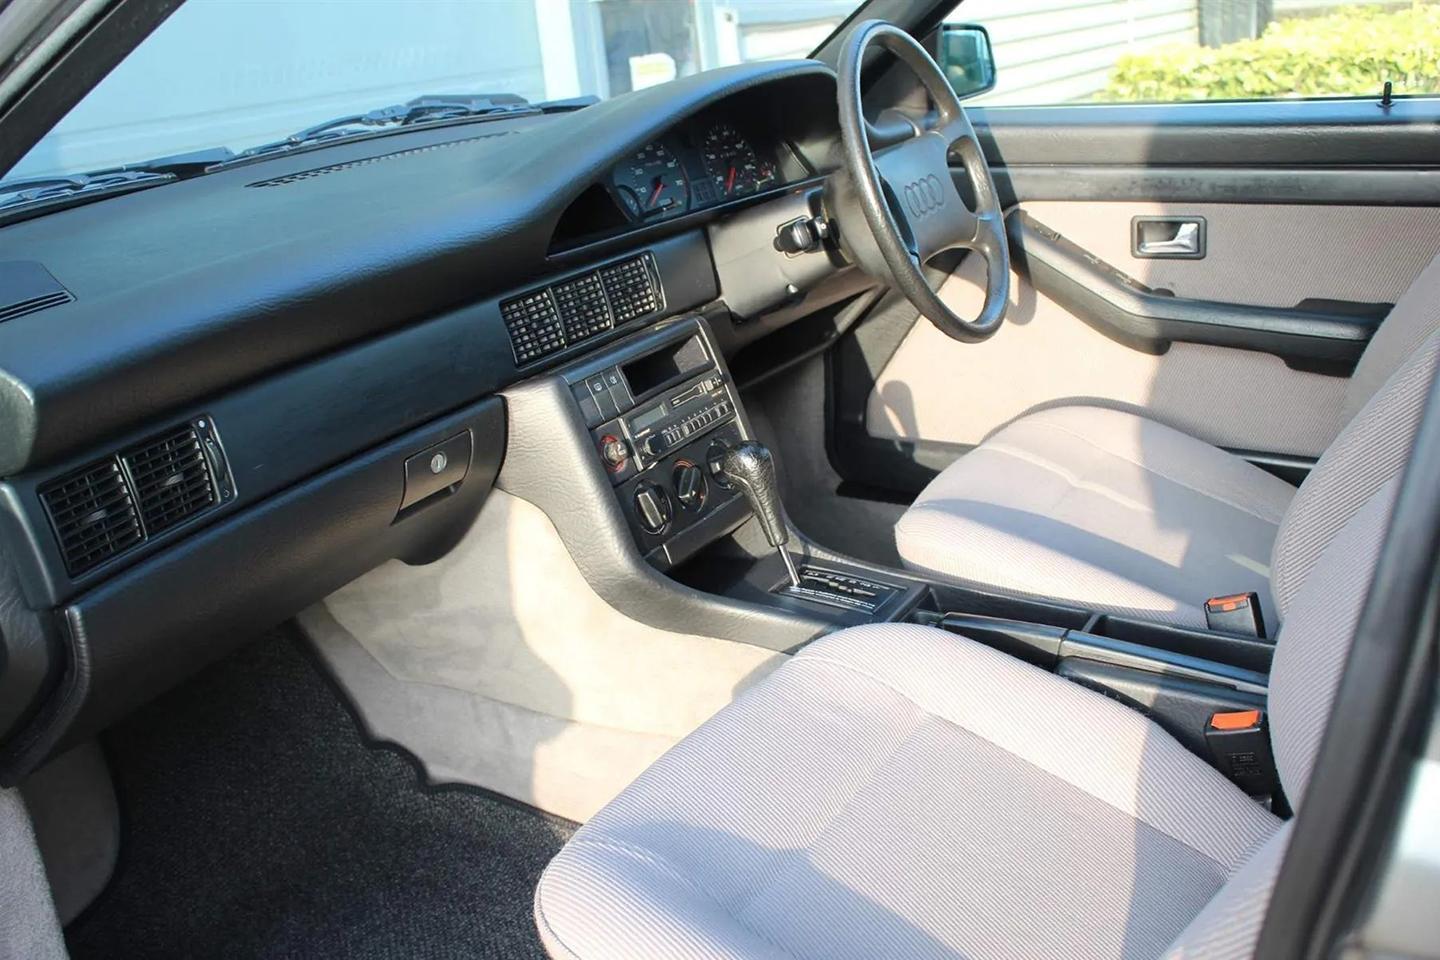
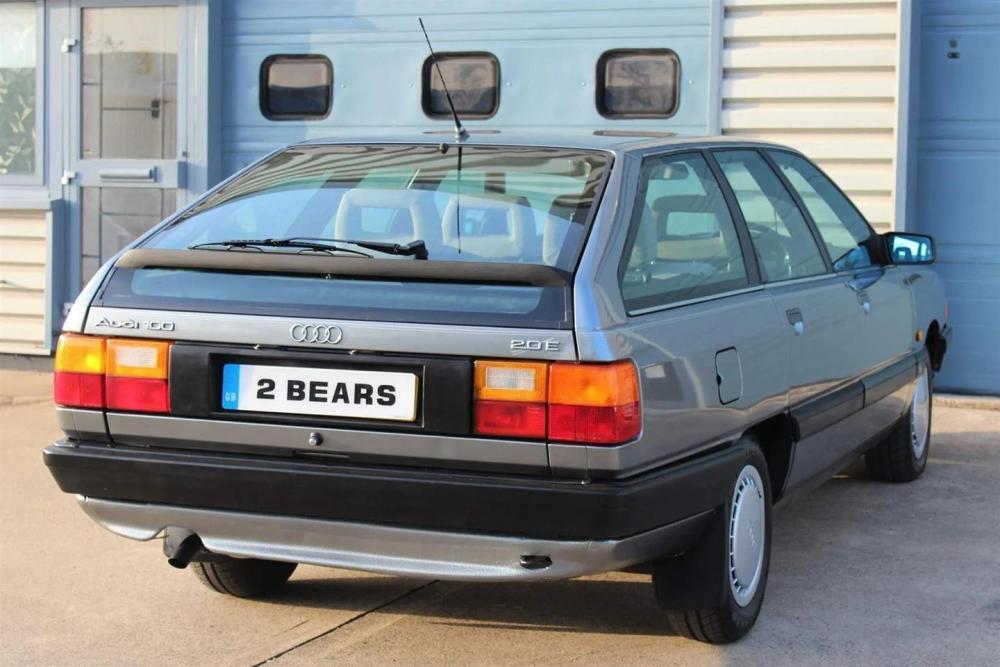
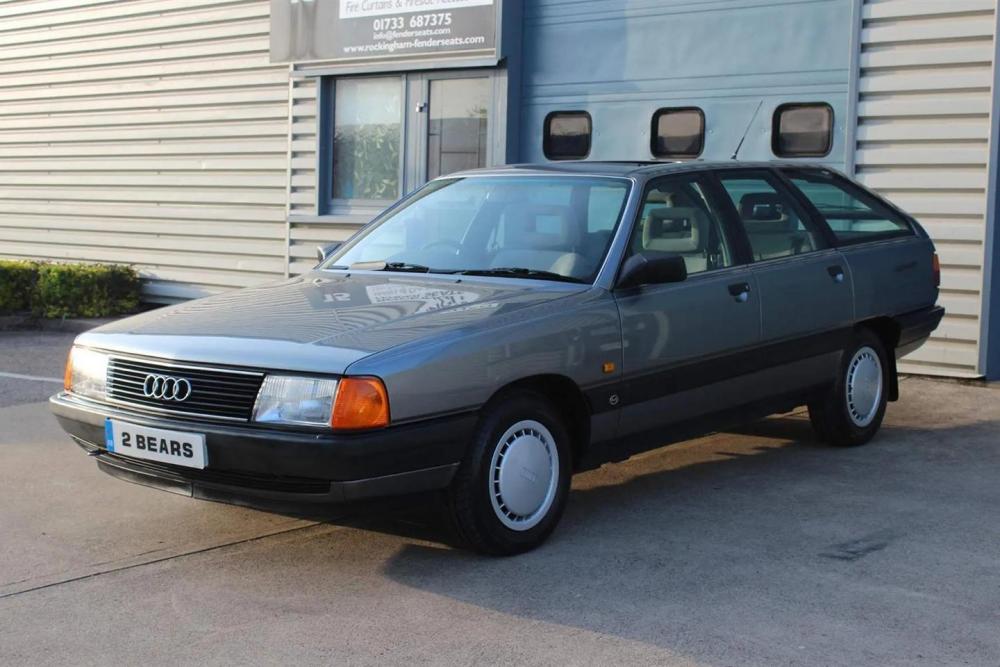
Audi UK itself spent time and energy nurturing this wagon - here's why you should too Audi occasionally gets a bad rap when it comes to handling, but the truth is a lot of the modern ones handle very ably: with a nice neutral balance and a good EPAS steering tune that plugs you into all four contact patches rather well. I find it's a setup that allows me to jump in and drive the wheels off them with that satisfying sixth sense that lets you know what grip is available before a corner, rather than after it, when you're parked, unintentionally, in a field. This wasn't always the case, though. Back in the day, Audis rarely appealed over a Mercedes or BMW. I never like their fundaments: an engine poking out the front grille just seemed so wrong, and making matters worse, it would be driving the front wheels or all four. This, to my mind, made them boring - even the fabled Audi Quattro. However, I've always been partial to an Audi 100 Avant. You see, limit handling doesn't really matter to me when the car's a big wagon. And back in the 80s this big wagon looked so, so futuristic that I would always stare longingly whenever I saw one flash by in the flesh. Or on the silver screen. Everyone remembers the 1961 Ferrari 250 GT California Spyder in Ferris Bueller's Day Off, but when I think of that great film, I also think of the red Audi 100 saloon driven by Mr. Bueller Snr. Albeit it, it was called an Audi 5000 in the States - but it was just as smooth. There wasn't anything else like the 100. It looked so space age, with its aerospace flush-fitting glass and, in Avant form, a fastback rear end with an angled rear screen split by a spoiler. When you look at it now, with those aircraft-carrier overhangs front and rear, you could argue they're a styling no-no. But no, no, not to me. I still think it looks just as smart as it always did. I want to own one, even though I know it would drive like a big bread and butter pudding. And who remembers the procon-ten safety advert? The one where the man with a handful of books and funny hair crashes into a woman with big hair and even bigger shoulder pads while walking down the street, because some accidents "are simply unavoidable." And then they decide to have the same crash while sitting in two Audis and, because of the procon-ten safety system fitted to each - with its interconnecting cables that you see in slow motion pulling the steering wheel away from the occupants - they both get out alive. Not only were they alive but their hair was too, and the man still has all his books. It was a miracle. They just smirked at each other and walked away like it's nothing. Which it wasn't, because afterwards the cars magically unfolded back to their un-crashed state. This made even the adverts during episodes of Knight Rider or The A-Team exciting. And it didn't matter that the steering wheel was only being pulled out of harm's way by the rearward movement of the engine and transmission, which was torpedoing into the footwell and your fleshy and breakable legs. This was the 1980s. Health and safety hadn't been invented yet. Instead we had something much better: Vorsprung durch Technik - or as my friend used to call it, 'Four sprung duck technique.' I loved Ian. I could go on, of course, so I will. The interior was just as ultra-modern and minimalist as the exterior, with clean lines and classy back-lit dials that appealed to smart, professional people like architects. Also, because the engine was so ridiculously far forward that they didn't have room for the radiator to sit in front of it, the Audi 100 had more interior space than Battersea Power Station. And speaking of power stations, this one has a five-pot motor, which has warbled away for just 47,000 miles. As you'd expect, then, it's immaculate, and looks as good as it can in elegant Quartz Grey metallic. Indeed, if the advert is to be believed, it's come from Audi's heritage fleet (come to think of it, I have a feeling I've seen one like it knocking around), it even has a great provenance that explains its condition. Come on - it's a cracker, right? https://www.pistonheads.com/news/ph-spottedykywt/former-press-fleet-audi-100-avant-for-sale/45583


-
This article has just been published in the last 9 hours: https://carbuzz.com/news/audi-reveals-big-changes-to-2023-model-range Here's the bit about the e-tron: Finally, we'll round off this massive list of changes with a few of Audi's EVs, starting with the e-tron and e-tron Sportback. The optional black headliner from last year is now standard, so no more mismatched headliners and material colors. Audi has also made the 22-inch wheels you see below standard on the Sportback, along with those killer orange calipers. There are some safety enhancements too, with new rear side airbags and illuminated seat belt buckles, including those Matrix headlights. Audi's Black Optic pack has also been rolled in with the Sportback's Prestige trim. Audi's sportier e-tron S and Sportback S models get a hair lighter with carbon fiber interior inlays, and the LED interior package is now standard for both body styles. The S model changes finish off with now-standard Matrix headlights. Last but not certainly not least, Audi has some changes for the Porsche Taycan-based Audi e-tron GT and its small-and-sporty Audi TT. The e-tron GT most notably now has a new body-color grille, along with a second charge port on the passenger side of the car. Happily, locking lug nuts are now standard, with all-season tires. While we're on the subject, the e-tron GT's Performance pack now has summer tires. 21-inch 10-spoke wheels in black now replace the previous year's grey ones, with the RS model adding carbon-ceramic brakes and 21-inch wheels. Also included is a toll module in the rearview mirror. Inside, all e-tron GTs now have Bang & Olufsen's 3D sound system, along with the RS getting new carbon inlays. All models also get new LED interior lighting fixtures and available heated seats via the Executive package.
-
From the TT to the RS e-tron GT, just about every Audi model is getting updated for 2023. Recently, Audi rolled out a release specifying all of the upcoming changes for its lineup in 2023. The point is to show us all that Audi deserves a place in the luxury segment at every level, from entry-level luxury cars like the Audi Q3 and A3, to much larger and more stately vehicles like the A8 and Q8. We thought it fitting to work through the massive list of changes to Audi's equally massive lineup. Changes include everything from paint colors to interior updates that customers will be able to see or feel as soon as 2023 model year vehicles begin rolling off the Audi production line in Ingolstadt. The A3's 2023 Updates Make It More Luxe Most of the Audi A3's 2023 updates are centered around making the car just a little nicer to be in. However, there are some more meaningful aesthetic changes as well. The latter means that the A3 now comes standard with LED headlights, door armrests in leatherette, and a wireless charger for purchasers of the Convenience pack on both the A3 and S3. Audi's Premium Plus trim also brings an LED lighting package and new birch wood inlays. Buyers of the Premium trim level can now also purchase adaptive cruise control as a standalone option for 2023. Finally, Audi has added a new 18-inch 5-spoke wheel for cars optioned with the Black Optic package. Audi's A4 & A5 Get Plenty Of New Goodies For the A4, 2023 changes mean an update to the A4's Premium Plus trim level. It'll now see the addition of a Bang & Olufsen 3D sound system as standard. From there, the A4 Allroad, and the A4 40 and 45 models now get standard LED headlights and DRLs while Audi's Black Optic pack is now available on Premium Plus and Prestige trims on the Allroad. Also available is the brand's Manhattan gray paint, and 18-inch 5-spoke wheels. The sportier A4 45's Black Optic pack now blacks out the exhaust tips and rear lip spoiler. Don't go thinking the high-performance Audi S4 is left out either. In addition to adding adaptive cruise control to the A4 family's Convenience Package, the S4 gets a new Black Optic Plus update that includes black rocker sill blades, rear lip spoiler, exhaust tips, and Audi badges. Audi's 18-inch wheels are now 19-inchers with standard summer tires (all seasons are still available), and there's a new Audi Sport pack that includes black interior surfaces with red stitching and carbon inlays. Some paint changes have been made to the A4 and A5 lineup. Audi has replaced Quantum gray with Chronos gray, and District green is now available for the whole A4/5 lineup. Unfortunately, Audi's Turbo blue is no more, joining Terra gray in the paint shop in the sky. Also gone is the Audi RS5's Sonoma green, which has been replaced with Ascari blue. The larger Audi A5 has a similarly long list of changes. Like the A4, LED headlights are here for the entire lineup, along with a Bang & Olufsen system (but only on the Premium Plus trim). The lineup will also now benefit from adaptive cruise in the Convenience package, while a new 18-inch, 5-spoke wheel is now available on the A5's coupe, sportback, and cabriolet body styles. The A5 Cabriolet also gets S line exterior changes, illuminated door sills, new grey oak wood inlays, and sportier front seats. Again, like the A4, the A5's Black Optic pack now covers the exhaust tips and rear lip spoiler. The Audi S5 Sportback and coupe also get the S4's Black Optic Plus pack and Audi Sport interior. Audi's Luxurious A6, A7, and A8 Get Their Share Too Premium trim Audi S6, A6, A7, and S7 models now benefit from the brand's adaptive cruise and lane-keep software, for starters. Speaking of assists, Prestige models now get Audi's remote parking software. Audi has also updated some interior furnishings for the lineup, too. The S6 and S7 now have an Audi Sport pack with black leather and red stitching throughout, including red-edged seatbelts. Audi's big S-branded saloons also benefit from LED interior lighting, heated rear seats, and an extended leather upgrade with all of Audi's driver-assist software for the Premium Plus trim level. Finally, the RS6 and RS7 both get a new microfiber headliner, which makes its way into Prestige trim A6 Allroads too. The Audi A8's list of changes is decidedly less comprehensive. For 2023, remote park assist plus has been added to the A8 Executive package, as well as the S8. HD Matrix-design LED headlights are available as part of the Comfort plus package. Finally, Audi S8 now has a new Valcona leather interior option. Audi's Most Popular SUVs Aren't Left Out First, the Audi Q3. Full LED headlights and DRLs are standard for all Q3 models and trims, which is something of a theme. Audi is adding that feature to many of its models. The Q3's dated phone box is now gone, replaced with a more modern wireless charging pad. Additionally, Q3 40 models get a new 18-inch, 5-spoke wheel, and optional 19-inch V-spoke wheels, the latter of which is part of a new Black Optic package for premium trims. That adds a black rear lip spoiler and exhaust tips to existing black bits on the car. Finally, the Q3 45 gets new 20-inch wheels with summer tires as an option, but only if you grab the aforementioned Black Optic pack. The Audi Q5's list of changes for 2023 is somewhat more succinct, despite it being Audi's top-selling product. Unlike other Audi models, you won't need the Convenience Package to get adaptive cruise control. Instead, it's now standard on both Q5 and SQ5 models. Speaking of packages and trims, the Premium Plus trim level now gets a Bang & Olufsen 3D sound system, something carried over to other models in the range. Audi also swapped Quantum gray for Chronos gray on Q5 45, Q5 55, and SQ5 models. The Audi Q7 Has A New Engine Audi has added its much-loved and much-used turbocharged four-cylinder to the Q7, which now makes 13 more horsepower than last year's model, at 261 hp. Again, Audi's Matrix LED headlights can be found in the Premium Plus trim, with those same lights coming as standard in the Q7 55 trim. Speaking of trims, both the Q7 and SQ7 now have remote park assist for the Prestige trim, with adaptive cruise and lane-keep again found in the 7's Convenience Package. Audi has also extended leather and leatherette surfaces on both the standard and Premium Plus models. For 2023, the SQ7 should be getting a little more quiet thanks to new dual-pane glass, but new 22-inch wheels could mitigate that effect due to road noise. We'll have to wait and see. Those 22-inch wheels will come in two different styles, in either a matte metal look or black, fitting with Audi's Black Optic pack. Each of those will be shod in summer tires from the factory. There's some paint changes as well for the Q7 lineup, with the addition of Waitomo blue, Tamarite brown, and Satellite silver now replacing 2022's blue, silver, and brown colors. Audi's Q8 Has Similar Changes Like the Audi Q7, the Q8 drops its silver, blue, and brown colors in favor of new ones, identical to those found on the Q7. And, like so many other models in the range, adaptive cruise control and lane-keep are now part of the brand's Convenience package. Since Audi's LED Matrix lights are standard for the Q8, Audi has also decided to include headlight washers and the brand's signature coming/leaving home dance on the model. Like the Q7, the Q8 also now has the extended leather and leatherette options discussed above, including the extended leather found in the Premium Plus trim. A little luxury has been added to the sporty RS Q8 with electric sunshades now found on the rear doors, and a now-standard Nappa leather package. Finally, Audi's remote park program is now part of the RS Q8's executive package. Finally, we'll round off this massive list of changes with a few of Audi's EVs, starting with the e-tron and e-tron Sportback. The optional black headliner from last year is now standard, so no more mismatched headliners and material colors. Audi has also made the 22-inch wheels you see below standard on the Sportback, along with those killer orange calipers. There are some safety enhancements too, with new rear side airbags and illuminated seat belt buckles, including those Matrix headlights. Audi's Black Optic pack has also been rolled in with the Sportback's Prestige trim. Audi's sportier e-tron S and Sportback S models get a hair lighter with carbon fiber interior inlays, and the LED interior package is now standard for both body styles. The S model changes finish off with now-standard Matrix headlights. Last but not certainly not least, Audi has some changes for the Porsche Taycan-based Audi e-tron GT and its small-and-sporty Audi TT. The e-tron GT most notably now has a new body-color grille, along with a second charge port on the passenger side of the car. Happily, locking lug nuts are now standard, with all-season tires. While we're on the subject, the e-tron GT's Performance pack now has summer tires. 21-inch 10-spoke wheels in black now replace the previous year's grey ones, with the RS model adding carbon-ceramic brakes and 21-inch wheels. Also included is a toll module in the rearview mirror. Inside, all e-tron GTs now have Bang & Olufsen's 3D sound system, along with the RS getting new carbon inlays. All models also get new LED interior lighting fixtures and available heated seats via the Executive package. To top it all off, Ingolstadt has added new 18-inch wheels to the Audi TT Coupe and Roadster. That's it; the TTS is unchanged. Audi had previously pronounced the TT RS dead beyond 2022, and that seems to be true. We suspect that the changed stance is a result of production backlogs, while news on the R8 supercar will likely follow in a separate announcement. Yes, an anti-climatic end to this massive list of 2023 model year changes for the Audi lineup, but an end nonetheless. Thankfully, all of these changes will be real, tactile changes customers will be able to notice as soon as they see a 2023 Audi. Supposing the supply chain doesn't have anything to say about it. https://carbuzz.com/news/audi-reveals-big-changes-to-2023-model-range
-
Six former winners headline Audi Sport’s two-car lineup for German endurance classic. http://johndagys-wpengine.netdna-ssl.com/wp-content/uploads/2020/02/ss365-1.png Sportscar365 NÜRBURGRING ENDURANCE Audi Sets Factory Driver Roster for N24 Six former winners headline Audi Sport’s two-car lineup for German endurance classic.. by Davey Euwema April 20, 2022 Photo: Audi Audi will field two cars with a full factory driver roster at next month’s Nürburgring 24, with cars from Car Collection and Phoenix Racing supported by multiple privateer entries. The German manufacturer last won the Eifel classic in 2019 and will go into this year’s edition looking for its sixth overall victory. It finished off the overall podium last year, with its best-placed car ending the race in fifth. Audi Sport Team Phoenix, which was responsible for Audi’s last victory in the twice-around-the-clock enduro, will enter a single Audi R8 LMS GT3 Evo II with a lineup consisting of three former winners. Dries Vanthoor and Frédéric Vervisch, winners in 2019, will partner with 2017 winner Kelvin van der Linde. Their squad is completed by reigning FIA World Endurance LMP2 champion Robin Frijns. Audi Sport Team Car Collection, meanwhile, will field a team consisting of Christopher Haase, Nico Mueller, Patric Niederhauser and René Rast. Haase is a two-time winner in the event (2012 and 2014), while Mueller and Rast won the race in 2015 and 2014 respectively. In addition to the two factory entries, Scherer Sport by Phoenix and Lionspeed by Car Collection Motorsport will both field two-car entries. They will be supported by a roster of five factory drivers consisting of Mattia Drudi, Ricardo Feller, Christopher Mies, Frank Stippler and Markus Winkelhock. “We’re well prepared for the anniversary of the classic race in the Eifel,” said Head of Audi Sport Customer Racing Chris Reinke. “At the 50th edition, we’re facing the sporting competition for victory with strong driver combinations, two Audi Sport customer racing cars and additional private R8 LMS cars. “We want to expand our position as the most successful manufacturer of the GT3 era in the world’s biggest race.” https://sportscar365.com/other-series/n24/audi-sets-factory-driver-roster-for-n24/

-
Plus ironically they wouldn't allow me to display my Audi as it's not performance version according to the website. That kinda makes it more difficult as the main club events guy with club banner and stuff.
-
I've had a look online and there doesn't seem that much out there. If it were me I'd speak to your local vag retrofitting company. Or alternatively your local car Audi upgrading company as there's various companies out there.
-
I've had a look online and can't see anything. Might be worth you contacting Audi digital services. Also heres a hack, if you change your region to Germany you can get more/different features. You'll have to do some translating though.
-
-
Nope as we found out about the event too late. We are attending Jap Vs german though on the 8th may.
-
Yep it can be repaired. My advice would be to Google Audi pixel repair to find various companies. I personally can't recommend one though.
-
Hi there, unfortunately we won't have a club display as we only found out about the event a week or so ago. But we are attending Jap Vs german on the 8th may.
-
-
No probs at all, glad I could help. If you contact your Audi dealer they should be able to provide you with information on the work that's been done at any Audi garage.
-
No need to apologise you've got good English 🙂 I wonder if the mechanic changes oil and filters then does it again in around 1000km to see if it's black again. Do you know when it was last changed prior to your mechanic doing it? It could be the clutches or the oil.cooler maybe especially if it's doing it when hot.
-
The modules can fail a d I suspect that'll be cheaper than a new gearbox.
-
Or try a gearbox specialist.